AutoMate, an Autonomous Vehicle Interface

September, 2017 - December, 2017

With Autonomous Vehicles (AVs) on the rise, how can we shape an in-vehicle user experience that creates a bridge of trust between passengers and the car? AVs may seem like a black box to many potential users. What my team was working towards in this project was to develop an interface for a fully autonomous vehicle that conveys relevant information to the passengers that shows not only what the car is reacting to, but also what the car is anticipating in the environment.

Across the majority of the AV stakeholders, there is a fear of autonomy on the road. Potential stakeholders would be anyone who might use an autonomous car for transport - i.e. people who use public transit, people who use Uber/Lyft, elderly people, children who need to get to school. There are a lot of personas and scenarios that you could make up for the autonomous vehicle user, and I think that’s why it’s so interesting to me. Tech that would have to be focused on is both in-vehicle passenger notification systems, as well as external notification systems that could notify pedestrians.

For the sake of this project, we made our target audience elderly people who use a personal to get around. We chose this audience for two reasons: (1) people 65+ years old are consistently responsible for roughly 10% of all auto accidents, and (2) elderly people are more likely to be resistant to new technology than younger people - it would be more of a challenge to get them to use and trust an autonomous car.

This project was for the School of Information course SI 482: Interaction Design Studio. The goal was to choose a project and get practice working through all of the steps of the design process. Each step our group took is detailed a bit below.

  1. Finding a problem and establishing a problem statement. To get our entire team on the same page, we clearly defined the exact problem we were trying to solve so that we could make sure our later work was within our scope throughout the project.
  2. Competitive analysis. To find competitors, we asked three questions: (1) What technology already exists within vehicles that delivers the driver feedback as to what the car is detecting around it? (2) How do already existing AV systems deliver feedback to drivers? And (3) how do currently existing autonomous technologies inspire user trust? I identified and researched a number of systems and companies, including Mercedes-Benz’s AV tech and Tesla’s Autopilot, among other auto manufacturers’ technologies. I also researched Starship Technologies quite extensively - they’re a company that creates autonomous drones that are meant to service humans in a variety of ways. We assessed how they work to build trust between their drones and the people that interact with them.
  3. Creating personas and scenarios. I personally created 2 of the 5 personas that we had for this project. I created a primary and a negative persona.
  4. Sketching alternatives and storyboarding. In this stage, I personally brainstormed 40 alternative solutions to our problem and sketched each solution. You can see a sample of one of the storyboards that I created here.
  5. Design Space Analysis. Using a Question, Options, Criteria (QOC) approach, we started to weigh out what our biggest challenges were and what specific solutions we wanted to focus on - i.e. what features we wanted to include and focus on in our wireframes and prototypes. I personally did 3 QOC trees.
  6. Paper prototyping. For our paper prototype, I personally created our interface template that had both our windshield screen and our center head unit screen. In the demo of our paper prototype, I was the “computer,” so I was the one moving the different elements around on the screens. You can view my paper prototype in action here.
  7. Digital prototyping. For our digital prototype, I did the user flow for our first version. We completely changed our interface in our V2. For this, I made all of our screens for the prototype and polished the user flow. I heavily used Sketch, Illustrator, and InVision in this stage of our project.
  8. Presentation. Simple and straightforward, I was the point person for presenting my team’s project and prototype to observers that saw our project in a gallery-style expo within the UM School of Information. I used Illustrator to create the poster that showed our problem statement, what our final product was and how it addressed our problem statement.

Final Outcome

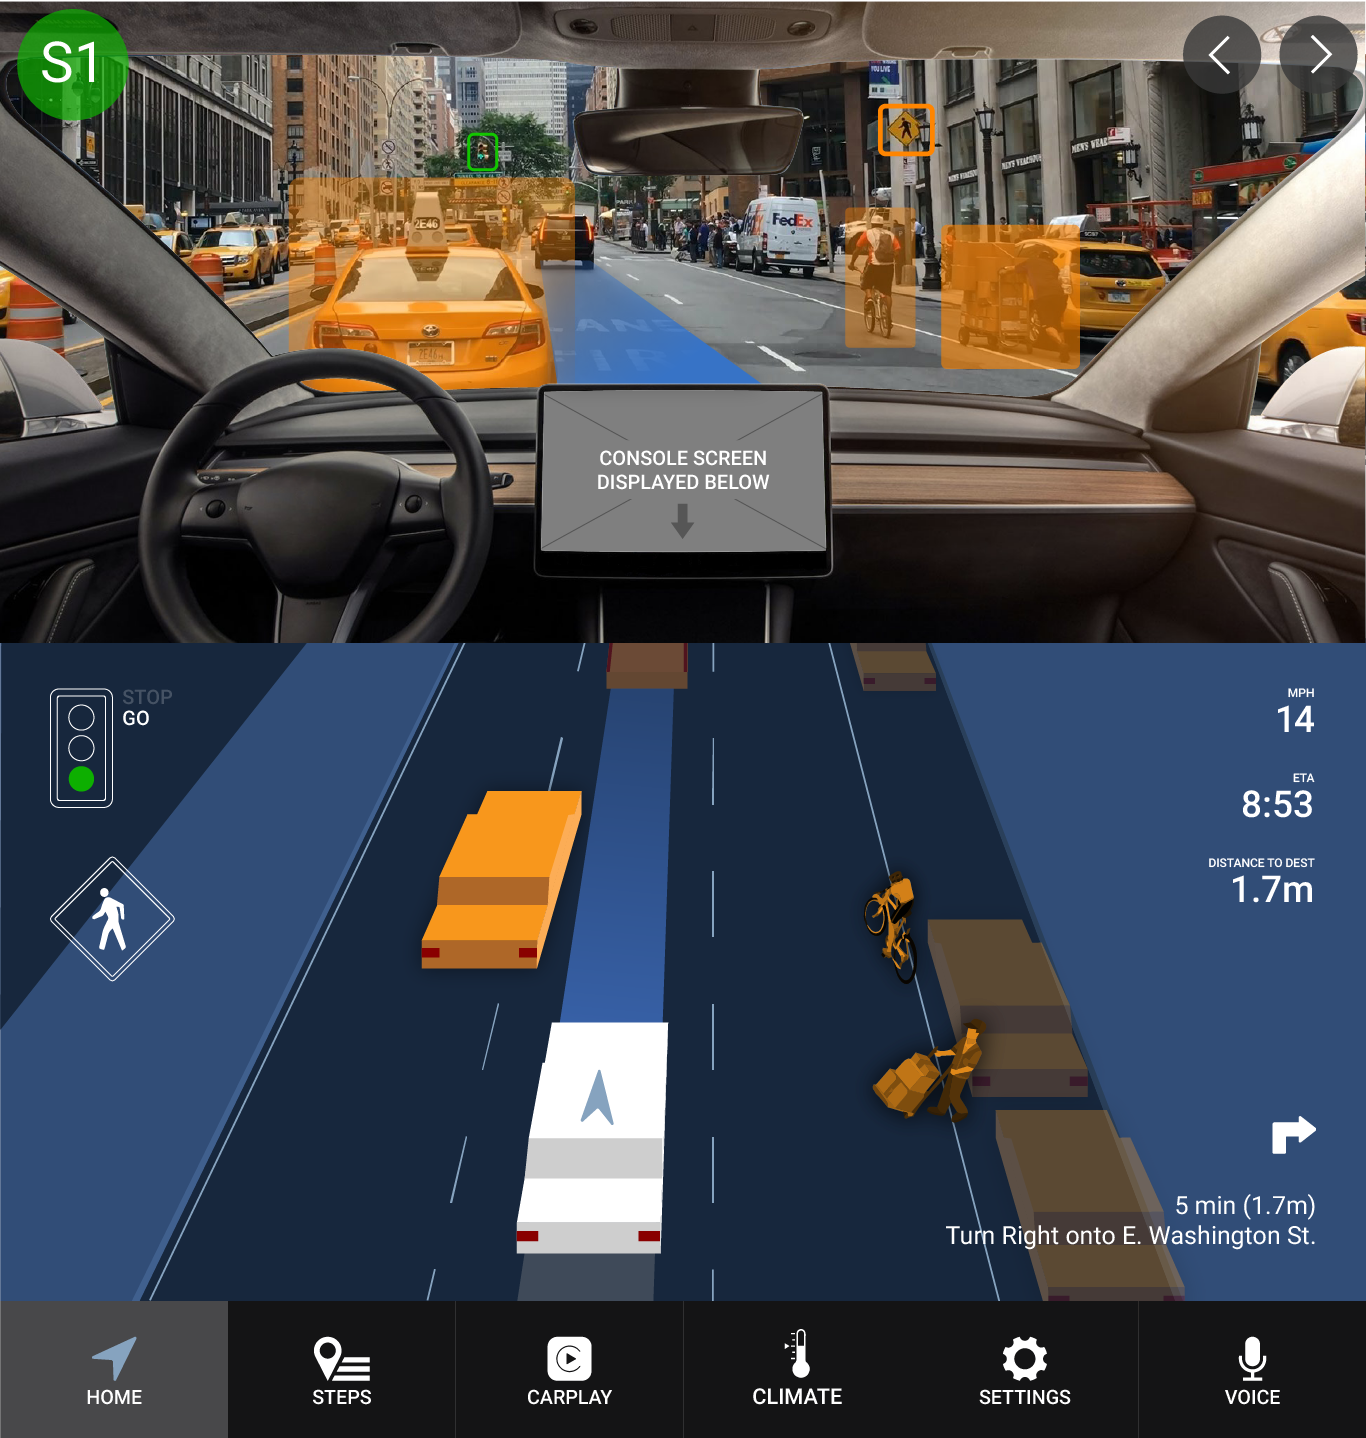
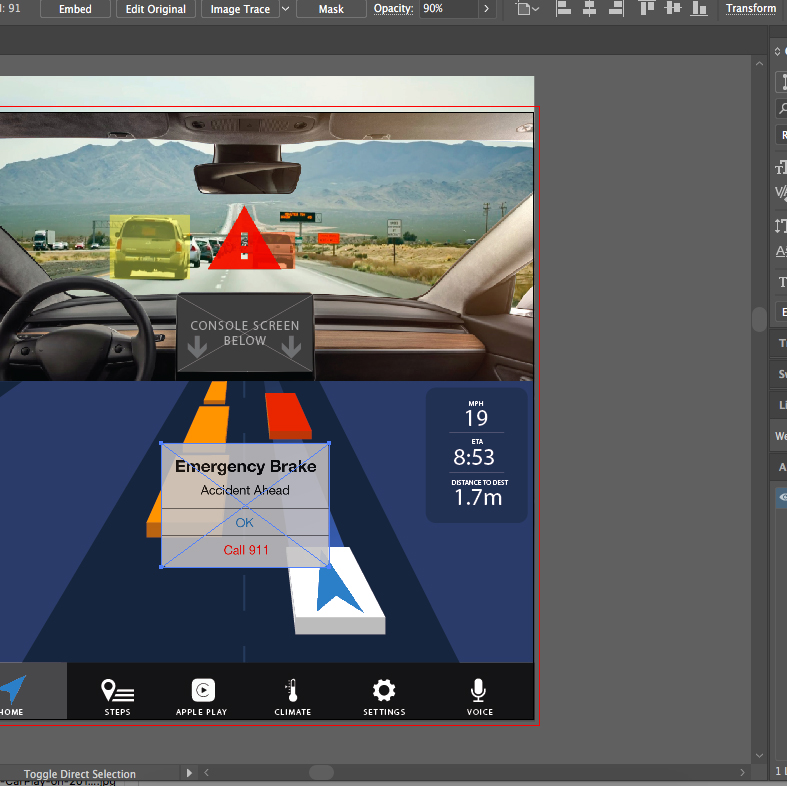
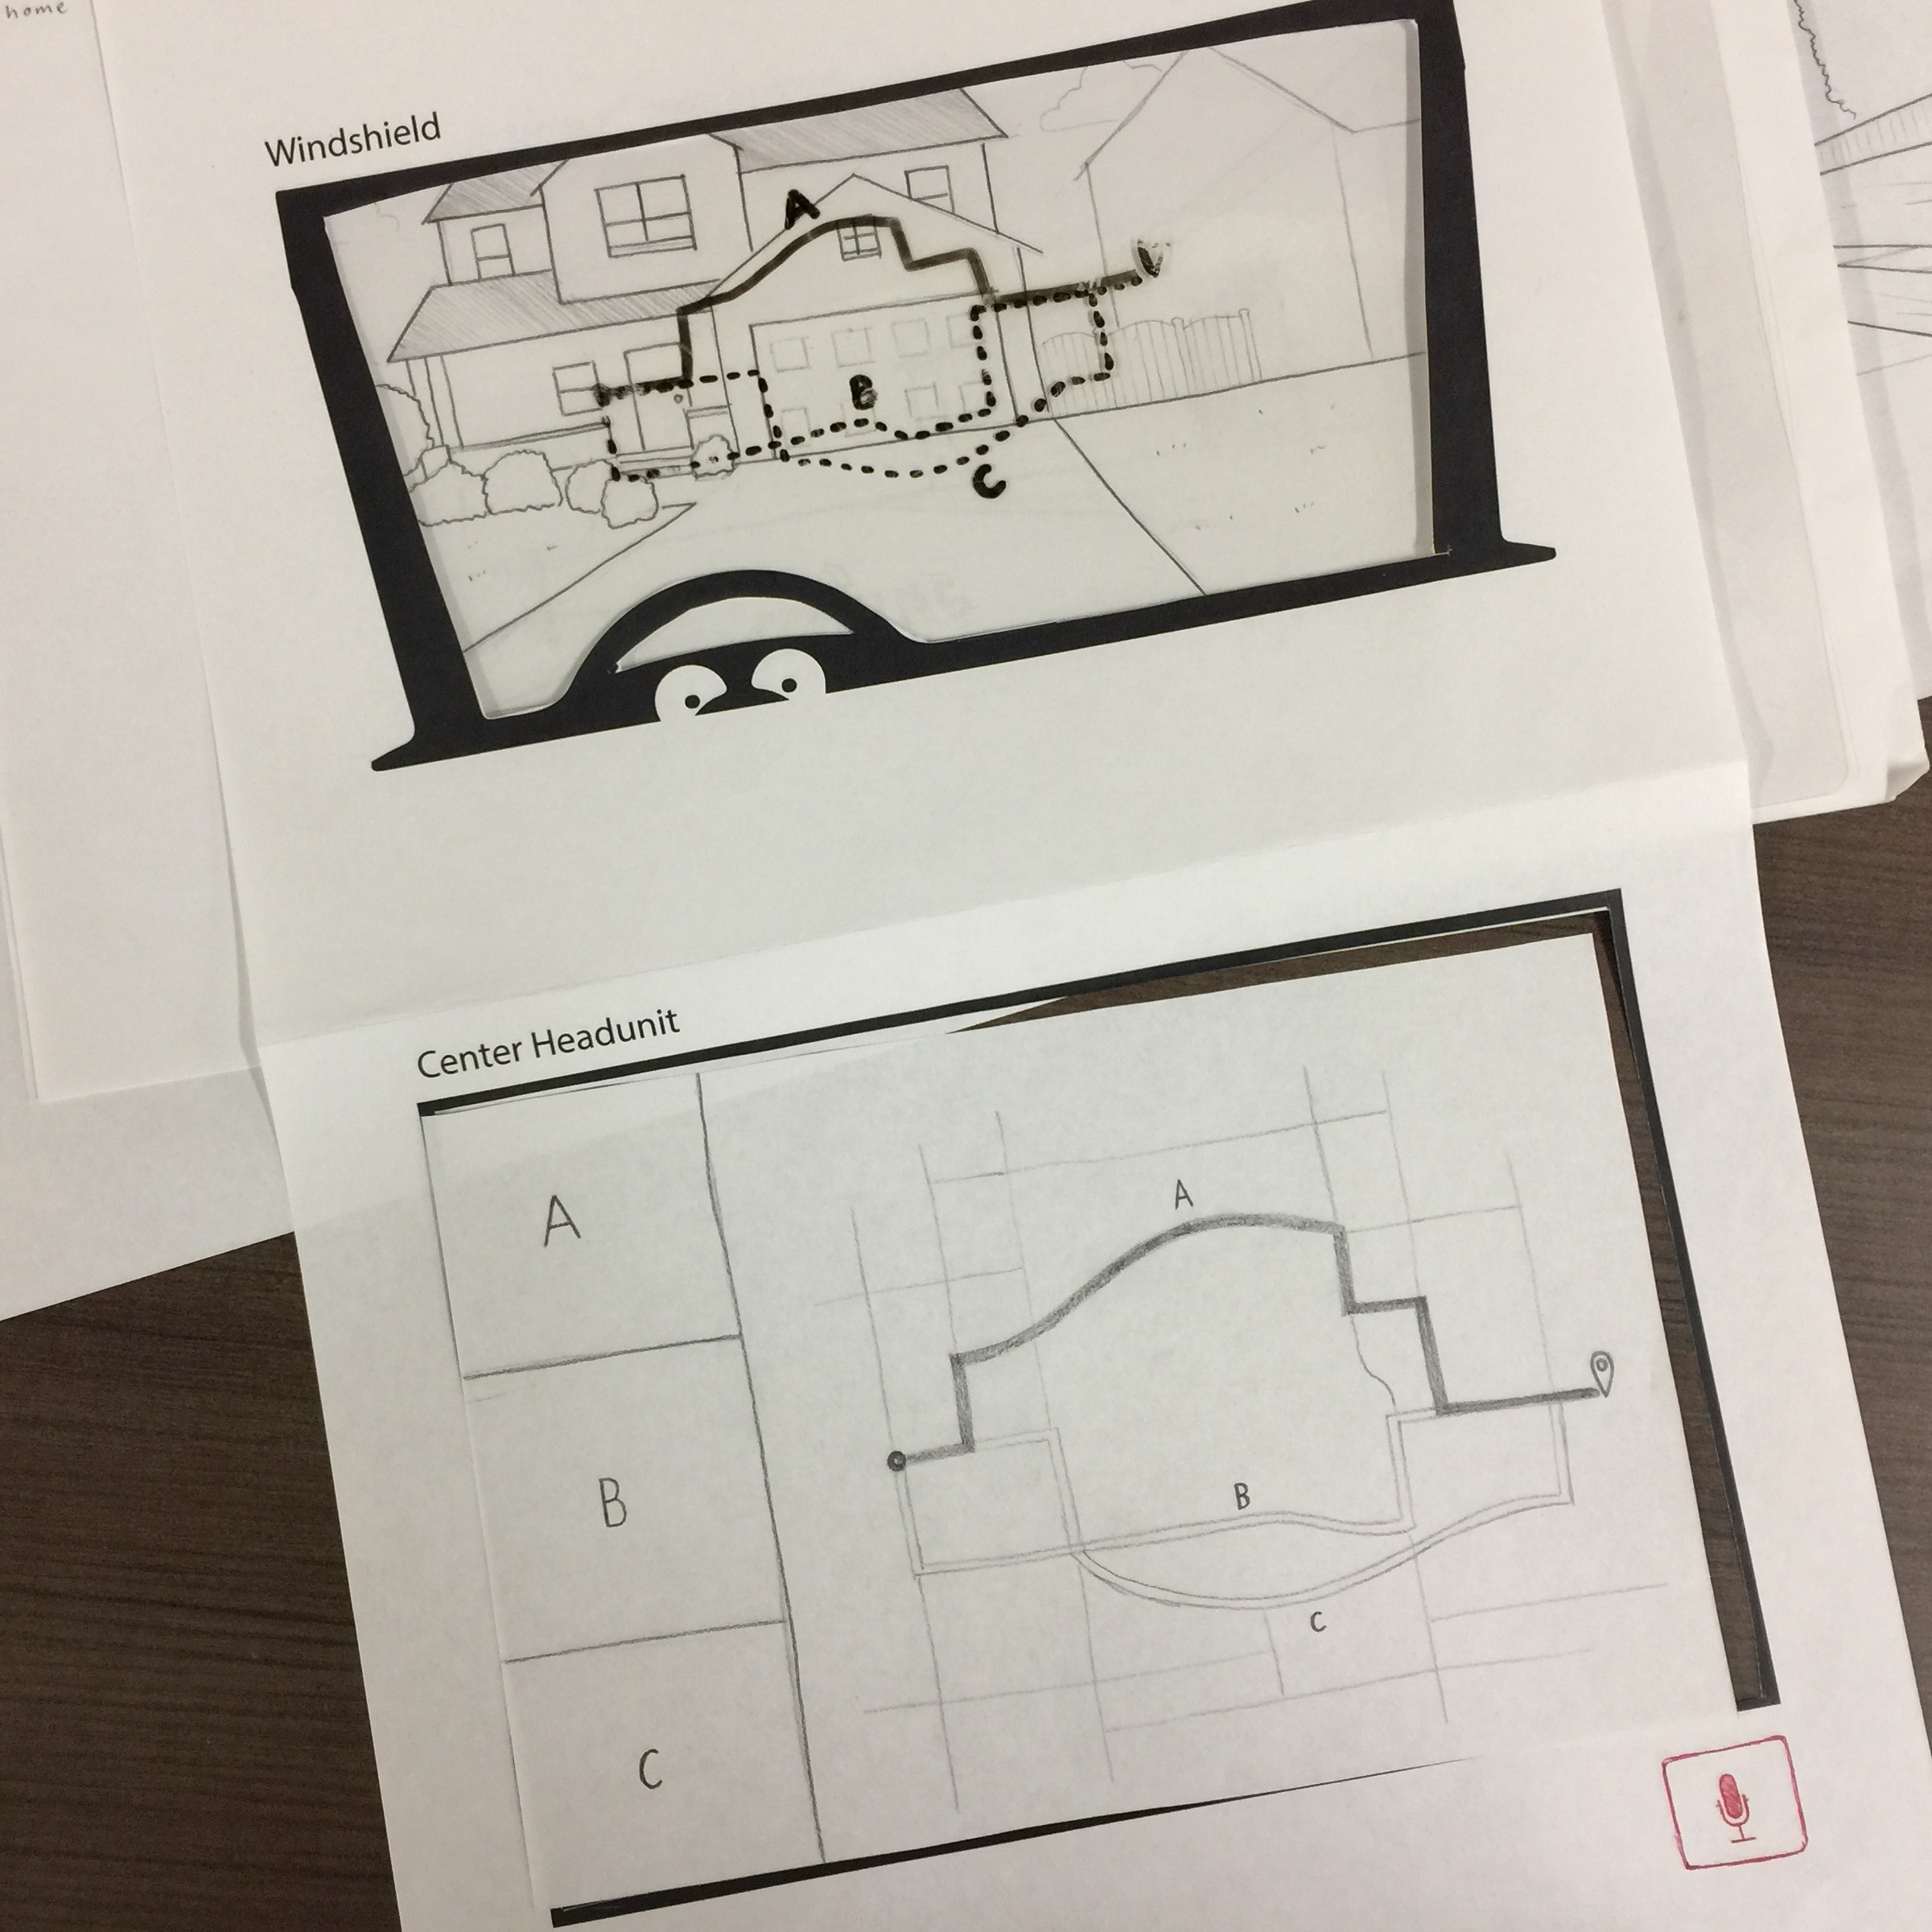
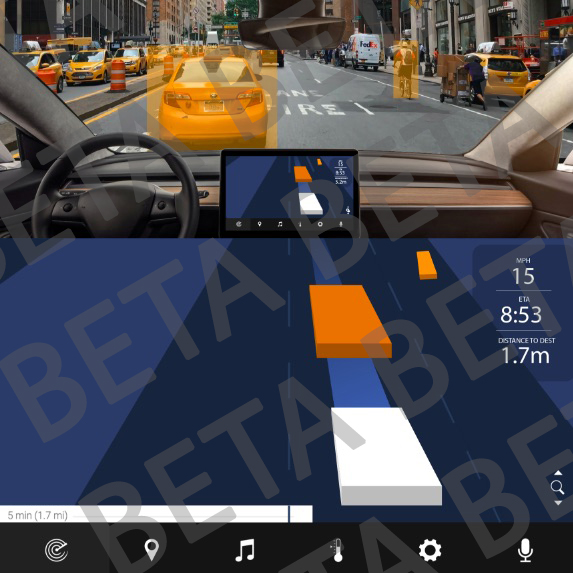
Our final product was a high-fidelity prototype of what our product would look like in a vehicle. We displayed the windshield highlighting system working in conjunction with the main infotainment screen in the car to convey important information to the front passengers. The first two slides in the photos above show what the final prototype looks like.

You can interact with my team's final digital prototype in InVision here.

PROTOTYPE NOTES:
The prototype consists of 4 different scenes - highway, night, rain, and urban driving environments. The user can switch between the scenes by using the arrow buttons in the top right corner. External scenarios can be activated by clicking the green buttons in the top left corner of the screens. You can click anywhere at any time to have the clickable hotspots lights up.

Note that those buttons would not be in the actual, physical vehicle interface - they're just there to interact with the digital prototype.